





Wifi Range Extender Singapore: Best WiFi Range Extenders
You're probably here because your Wi-Fi works fine in the living room, then falls apart the moment you step into the study, bedroom, or balcony. In Singapore homes, that's common. One room gets stable video calls, the next room gets buffering, frozen Zoom screens, or a smart TV that takes ages to load.
HDB and condo layouts make this worse. Thick internal walls, long corridors, household shelters, built-in cabinets, mirrors, and awkward router placement all chip away at signal strength. Many people assume their broadband plan is the problem. Very often, the issue is that the router's signal isn't reaching the spots where they use their devices.
That's where a Wi-Fi range extender can help. It's usually the first thing people look at because it's simple, relatively cheap, and doesn't require rewiring the home. But in practice, extenders only work well when you choose the right type and put it in the right place. A bad setup can leave you with a “full bars” icon and a connection that still feels slow.
Table of Contents
- Ending Wi-Fi Dead Zones in Your Singapore Home
- What a Wi-Fi Range Extender Actually Does
- Extender vs Mesh vs Powerline Which Do You Need
- How to Choose the Right Extender for Your Home
- Perfect Placement and Setup in HDBs and Condos
- Testing and Troubleshooting Common Issues
- Recommendations and Frequently Asked Questions
Ending Wi-Fi Dead Zones in Your Singapore Home
A typical Singapore setup looks like this. The router is installed near the fibre point in the living room, often beside the TV console or tucked into a cabinet because that's where the ONT and power sockets are. Everything seems fine until someone tries to work from the back bedroom, or a tablet starts buffering on the balcony.
That gap between “router location” and “actual usage location” is exactly why dead zones appear. In HDB flats and condos, Wi-Fi doesn't travel through space in a clean straight line. It gets weakened by walls, furniture, mirrors, kitchen appliances, and the layout itself. The result is familiar. Calls drop in the spare room, online classes stutter, and streaming gets unreliable at the worst time.
A Wi-Fi range extender is often the easiest first fix because it doesn't ask you to rebuild the whole network. You plug it in, connect it to your existing Wi-Fi, and use it to push coverage into the weak area. For a single stubborn room, that can be enough.
Still, not every dead zone should be treated with an extender.
Practical rule: If your issue is one weak corner of the home, an extender can be a good fit. If the whole flat feels patchy, you're usually dealing with a network design problem, not a single-room problem.
That's the part many generic guides miss. People search for Wi-Fi range extender Singapore solutions expecting any model to work, but the appropriate solution depends on where the weak area is, how your flat is laid out, and whether you're fixing one spot or trying to improve the entire home.
What a Wi-Fi Range Extender Actually Does
Think of it like a relay point
A Wi-Fi range extender doesn't create a fresh internet connection. It takes the Wi-Fi your router is already broadcasting, catches that signal, and rebroadcasts it further into the home. The simplest mental model is a relay runner. Your router starts the run, the extender receives the handoff, then carries the signal further toward the room that wasn't getting enough coverage before.
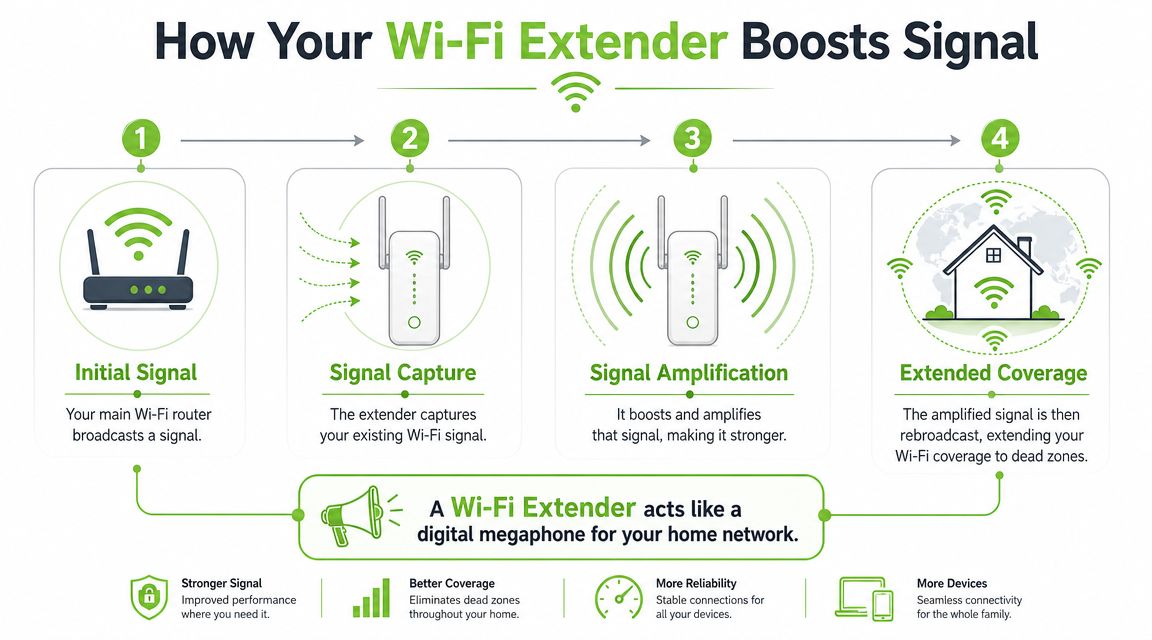
That sounds straightforward, but one detail matters more than everything else. The extender needs a decent signal to begin with. If you place it in a spot where your router's signal is already weak and unstable, the extender will repeat that weak and unstable connection.
This is why many extenders include some form of smart signal or placement indicator. The device is telling you whether it's receiving enough from the router to be useful. If the input is poor, the output will also be poor.
What it can fix and what it can't
A range extender is good at stretching coverage. It is not good at overcoming every Wi-Fi problem. It won't magically make a bad router excellent. It won't solve severe congestion across the entire flat. It also won't turn a weak corner behind several concrete walls into a perfect gaming zone if the signal reaching the extender is already compromised.
In practical terms, a Wi-Fi extender is best for situations like these:
- One weak bedroom: The rest of the flat is fine, but the room furthest from the router struggles.
- A study nook or work desk: You need a more reliable signal for calls and browsing in one consistent spot.
- A TV corner or console area: You want coverage in a place just outside the router's comfortable range.
It's less suitable when:
- The whole home is inconsistent: Coverage drops across multiple rooms.
- Your layout is heavily obstructed: Thick walls or awkward room geometry break signal paths repeatedly.
- You expect it to increase your broadband speed everywhere: It can only extend what already exists.
A range extender is a coverage tool, not a speed upgrade.
That distinction saves a lot of frustration. When people buy an extender expecting “faster internet”, they often end up disappointed. When they buy one to fix a specific dead zone and place it properly, it makes much more sense.
Extender vs Mesh vs Powerline Which Do You Need
How the three options differ in real homes
The mistake I see most often is buying based on a product category name rather than the actual problem at home. “Extender”, “mesh”, and “powerline” all aim to improve connectivity, but they solve different types of problems.
An extender is the budget entry point. In Singapore, basic Wi-Fi extenders can be found for as little as S$30, while mesh systems usually start at well over S$100, as noted in HardwareZone's comparison of extenders and mesh systems. That price gap is a big reason extenders remain popular for smaller homes or a single-room fix.
A mesh system is usually the better fit when you want more consistent whole-home coverage. Instead of patching one weak spot, mesh is meant to create a more organised wireless environment across a larger or more obstructed layout. If you're considering that route, Purple's expert WiFi insights give a useful high-level explanation of where repeaters fit versus more advanced architectures.
Powerline adapters solve a different problem. They use your home's electrical wiring to move network traffic from one point to another. In some homes, that helps when wireless signal paths are terrible but you don't want to run Ethernet cable openly. In others, electrical noise or circuit layout can make the result inconsistent. That's why powerline is often best treated as a situational tool rather than a default recommendation.
If you already know an extender won't be enough and want a cleaner whole-home route, a Google Nest WiFi add-on point option represents the kind of product people typically consider when stepping up from a single plug-in extender.
Network Solution Comparison for Singapore Homes
| Technology | Best For | Average Cost (SGD) | Pros | Cons |
|---|---|---|---|---|
| Wi-Fi range extender | One dead zone, one room, budget fix | From S$30 | Low upfront cost, easy to try, simple setup | Can struggle if placement is poor, usually less ideal for whole-home consistency |
| Mesh Wi-Fi system | Larger homes, multiple weak rooms, heavier daily use | Well over S$100 | Better whole-home coverage, more seamless experience | Higher cost |
| Powerline adapter | Hard-to-reach spots where wireless path is poor | Varies | Can help when Wi-Fi signal has too many obstacles | Performance depends on home wiring and layout |
A quick way to decide:
- Choose an extender if one part of the home is weak and the rest is mostly fine.
- Choose mesh if people move around the home and expect stable coverage everywhere.
- Choose powerline if the wireless path is the problem and you need another route to that room.
The cheapest fix is often correct for one room. It's usually the wrong fix for the whole home.
How to Choose the Right Extender for Your Home
The specs that matter in daily use
The spec sheet can look noisy, especially if you're comparing products late at night on a phone screen. Most buyers don't need to decode every acronym. They need to know which features actually change daily use in a Singapore flat.
Start with dual-band support. In denser environments like HDB blocks and condos, a single-band 2.4 GHz extender is often the compromise model. It can work for light use, but it's more exposed to congestion and less flexible under heavier traffic. For higher-density Singapore deployments, dual-band extenders matter because they can split traffic across 2.4 GHz and 5 GHz, reducing contention on the same band. Xiaomi's Singapore AC1200 extender advertises a combined 1200 Mbps across both bands, adds an Ethernet port, and supports Access Point mode plus SmartLink failover, according to Xiaomi Singapore's product details.
The next feature to care about is the Ethernet port. This matters more than many people realise. If you want to connect a smart TV, console, desktop, or streaming box, a wired connection from the extender can be more stable than relying on Wi-Fi for the last hop. But port speed matters. A gigabit port is a much better match for modern fibre setups than a slower legacy port.
A lot of people also over-focus on the extender brand. In practice, compatibility features matter more than the logo on the front. If your router is ageing and underpowered, even a good extender will be limited by the network feeding it. In that situation, improving the main router can be more useful than buying a fancier repeater. That's where a stronger base device, such as a dual-band AC1750 router option, becomes relevant.
A simple shortlist before you buy
If you're comparing a few models, use this checklist:
- Dual-band over single-band: Better for homes with many neighbouring networks and multiple active devices.
- Gigabit Ethernet if you'll wire anything in: Especially useful for TVs, consoles, or desktops.
- Access Point mode: Handy if you might later connect it by cable and use it more efficiently.
- Placement indicator or signal light: Makes setup less guesswork-heavy.
- Mesh compatibility if you may expand later: Useful if you might grow beyond a one-room fix.
Don't get trapped by headline wireless numbers alone. For many homes, the practical experience comes down to band design, port speed, and whether the extender can sit in a location that still receives a healthy signal from the router.
Perfect Placement and Setup in HDBs and Condos
Where most people get it wrong
Placement matters more than brand in many Singapore homes. That's not marketing talk. It's the difference between an extender that effectively fixes a dead zone and one that adds another layer of frustration.
In Singapore, TP-Link advises placing extenders about 20 to 40 feet from the router, depending on the model, in a spot where the router signal is still strong enough. The same guidance recommends placing the extender about 4 feet high, keeping antennas vertical, and facing the unit towards the router. It also notes that walls, cabinets, mirrors, and masonry weaken the rebroadcasted signal. You can find that in TP-Link Singapore's placement guidance.
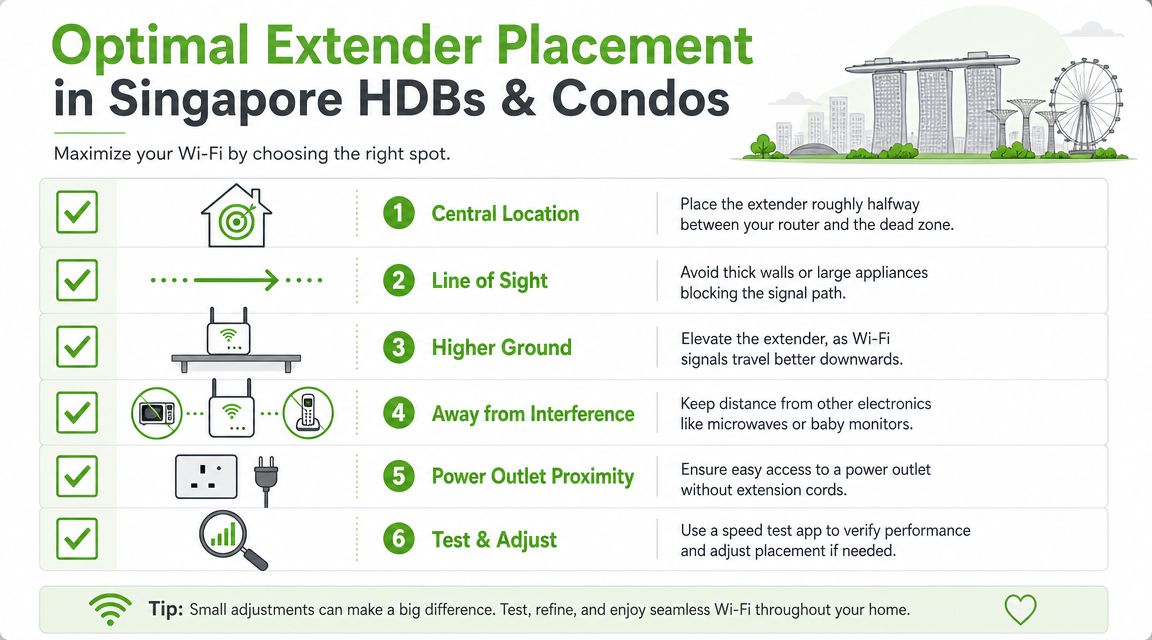
In local homes, the usual mistake is putting the extender at the edge of the dead zone because that feels intuitive. But that often means the extender is already starving for signal. It needs to sit in the transition area between strong coverage and weak coverage, not in the worst corner of the home.
Common blockers in HDBs and condos include:
- Concrete walls: Especially between living room and bedrooms.
- Household shelter areas: These can create awkward signal shadows.
- Large mirrors and glossy surfaces: They can interfere more than people expect.
- TV consoles and cabinets: Hiding networking gear inside furniture often hurts coverage.
Put the extender where the router still sounds clear, not where the Wi-Fi has already become unreliable.
Government guidance for home Wi-Fi also leans in this direction. Routers work better when placed centrally, higher up, and away from walls and interference sources. Extenders help only after that baseline is already sensible.
A practical setup routine
Most extenders are easy to set up. The hard part is not the app or button press. It's choosing the right wall socket.
Use this routine:
-
Start with the router first
If the router is on the floor, behind the TV, or inside a cabinet, move it if you can. An extender can't compensate for a badly placed main router forever. -
Pick the halfway zone
Walk from the router toward the dead zone and stop before signal quality drops too far. That middle area is usually the first place to test. -
Plug in at about chest or shelf height
A higher position is usually better than a low skirting socket. If your model has external antennas, keep them vertical. -
Pair it using WPS or the app
Most home users can finish this part quickly. The app is usually better because it also shows placement feedback.
Here's a short video if you prefer to see the process visually.
-
Walk-test the target room
Don't just look at Wi-Fi bars beside the extender. Stand where you use the device and test there. -
Shift one socket at a time if needed
One wall socket to the left or right can make a noticeable difference in some layouts.
Many “bad extenders” redeem themselves under certain conditions. The hardware wasn't the main issue. The first placement was.
Testing and Troubleshooting Common Issues
How to test if the extender is helping
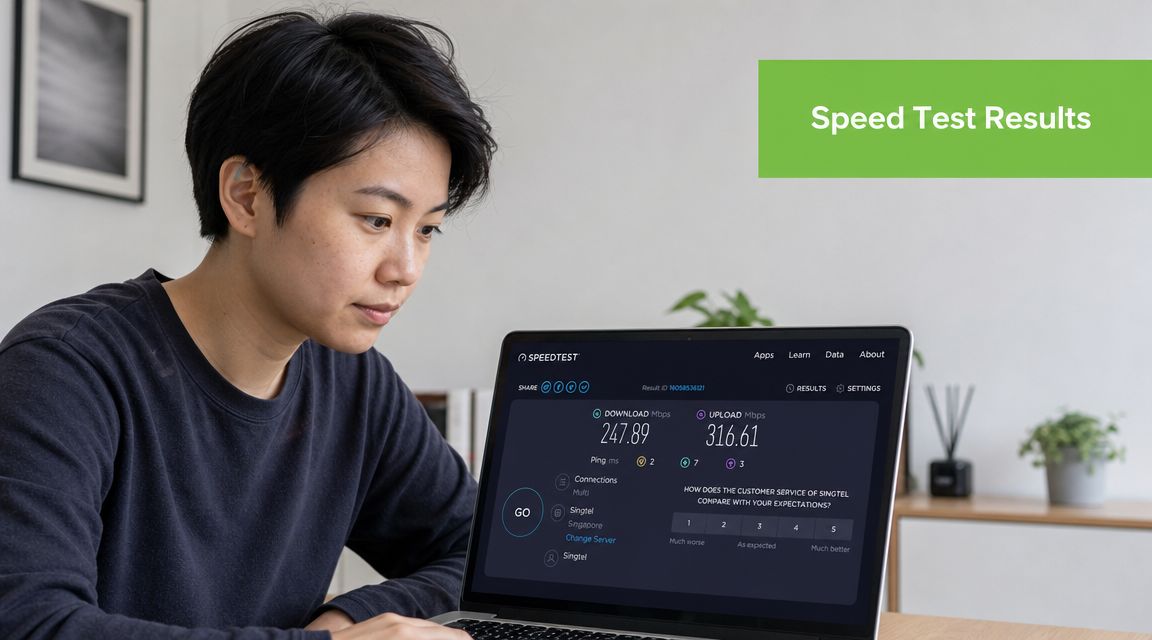
Once setup is done, don't judge the result by signal bars alone. Test the connection where you use it. That means the desk in the spare room, the sofa corner, or the TV cabinet. A speed test app is the simplest way to check whether the extender is improving the connection or just making it look stronger.
A common problem is repeating a weak signal. Entry-level extenders can also be limited by single-band radios and a 10/100 Mbps Ethernet port, which means practical throughput is capped well below the headline wireless number. That limitation is clearly visible on products like the TL-WA855RE listed by SourceIT Singapore.
Common problems and quick fixes
If the extender isn't performing the way you expected, work through these checks:
- Strong bars but slow speed: Move the extender closer to the router. This often means it's repeating a noisy signal rather than a clean one.
- Frequent disconnections: Try a different wall socket and restart both router and extender. Then check for firmware updates in the vendor app.
- Devices keep connecting to the wrong Wi-Fi point: Reconnect the device manually to the extender's network or rename networks clearly if your setup allows it.
- Wired device still feels limited: Check the Ethernet port spec on the extender. On entry-level models, the port itself can become the bottleneck.
Don't test beside the extender. Test in the room you were trying to fix.
If you've moved it a few times and the target room is still unstable, the extender may be the wrong tool for that layout.
Recommendations and Frequently Asked Questions
Best fit by user type
For a student or budget-conscious household, a basic extender makes sense when the problem is one bedroom or one study corner. That's the cheapest path and often the most reasonable one.
For a work-from-home user, don't buy based on marketing speed alone. Prioritise dual-band support and an Ethernet port if your desk setup includes a laptop dock, desktop, or smart display. Stability matters more than impressive packaging claims.
For a gamer or heavy streamer, an extender can work if the weak area is close enough to the router for a clean relay. If not, mesh or a wired access point approach is usually the better long-term answer.
If you're still deciding what type of Wi-Fi expansion hardware suits your setup, browsing dedicated e‑Xtender options at myhalo can help you compare the general category before narrowing down the right architecture.
FAQ
Does the extender brand need to match my router brand?
No. Matching brands can make setup simpler in some ecosystems, but it isn't the main factor. Placement, band support, and hardware capability matter more.
Will an extender reduce speed?
It can, because it's extending an existing wireless connection rather than creating a new fibre path. That doesn't make it useless. It just means the goal should be better usable coverage, not expecting a miracle boost.
Can I use an indoor extender on a balcony in Singapore?
Usually that's not the right move. For outdoor or balcony coverage in Singapore's climate, official guidance points towards weatherproof outdoor Wi-Fi hardware with IP65/IP67 protection rather than a normal indoor plug-in extender, as shown in Omada's Singapore outdoor Wi-Fi guidance.
When should I skip the extender entirely?
Skip it when multiple rooms are weak, your layout is heavily obstructed, or you need more stable coverage throughout the home rather than just one corner.
If you're trying to fix patchy home Wi-Fi without overspending, myhalo is a useful place to explore practical tech options in Singapore. Beyond devices, myhalo also helps with setup-related needs around connected tech, making it easier to choose a solution that fits your home instead of chasing specs that won't solve the underlying problem.