





Laptop Keyboard Replacement in Singapore: 2026 Guide
A dead key rarely fails at a convenient time. It happens when you're rushing an assignment, replying to a client, or trying to log in and your password won't register because one letter has stopped working. Sometimes it's a crumb under the keycap. Sometimes it's a spill. Sometimes the keyboard is telling you the whole assembly is on its way out.
In Singapore, that decision gets practical very quickly. Do you clean it, attempt a DIY laptop keyboard replacement, send it for repair, or cut your losses and upgrade in a more sustainable way? The right answer depends on the fault, the laptop model, the availability of parts, and how much risk you're willing to take with a machine you probably still need tomorrow.
Table of Contents
Is Your Keyboard Beyond Repair or Just Dirty
A coffee splash across the palm rest feels like instant disaster, but don't assume you need a full laptop keyboard replacement the moment one key misbehaves. Start with diagnosis. A keyboard can fail in very different ways, and the symptoms tell you a lot.
If one or two keys feel sticky, register late, or need extra force, dirt is still on the table. Dust, crumbs, and oily residue often collect around the scissor mechanism and stop the key from travelling cleanly. If a keycap has popped loose but the mount underneath still looks intact, that's a very different problem from a membrane or circuit failure.
Start with the pattern of failure
Look at what the keyboard is doing, not just one bad key.
- Single-key issue: One letter doesn't respond, or the keycap sits unevenly.
- Cluster failure: A row or block of keys stops working together. That often points to a connection issue rather than dirt.
- Ghosting or auto-typing: Characters appear on their own, or pressing one key triggers another. That's a warning sign of deeper electrical trouble.
- Complete failure after liquid exposure: If the keyboard became erratic after coffee, milk, or another drink, assume the problem may have travelled below the visible surface.
Practical rule: If the fault moved from “one awkward key” to “random typing behaviour”, stop treating it like a cleaning job.
What you can safely try first
Before opening the laptop, keep the first round simple and low-risk.
- Power it down fully: Don't test a damp or contaminated keyboard while the machine is live.
- Inspect the key area in bright light: Check for food debris, broken plastic clips, or a keycap that's not seated properly.
- Use non-metal cleaning tools: A soft brush, blower, and lint-free swab are safer than improvised sharp tools.
- Test again after cleaning: If the key action improves, you may have avoided a replacement.
For routine cleaning, a proper electronics kit helps more than tissue paper and guesswork. A compact set with brushes, picks, and blower tools is far more useful than trying to dig debris out with a paper clip. This kind of electronics cleaning kit for keyboards and small device gaps is the sort of thing that matches the job.
When cleaning isn't enough
If the keyboard starts typing by itself, misses whole groups of keys, or becomes unreliable after a spill, assume the issue is underneath the keycaps. That's where many people lose time. They keep cleaning the surface while the fault sits at the ribbon connector or inside the keyboard assembly.
Some laptops also make single-key fixes unrealistic. In local repair practice, replacing individual broken keys often isn't feasible, and the usual path is replacing the full keyboard panel instead, especially when the underlying structure is damaged or the key mechanism has failed.
A correct diagnosis saves more money than any screwdriver set.
At this point, the decision becomes clearer. A light cleaning solves contamination. A loose cap may be a minor fix. Repeated non-response, spill damage, or erratic input usually means you're choosing between DIY replacement, professional repair, or stepping back and asking whether the laptop itself is still worth saving.
DIY vs Professional Repair The Singaporean Reality
DIY sounds cheaper until you count the full cost of getting it wrong. Laptop keyboard replacement looks simple in short videos, but many laptops hide screws under rubber feet, route ribbon cables through tight channels, or require much deeper disassembly than expected.
That matters because the local trade-off isn't just money. It's downtime, risk, parts availability, and whether you can afford to turn a keyboard problem into a motherboard problem.
The numbers that change the decision
A 2024 Singapore Repair Industry Benchmark Report shows that 78% of DIY attempts fail due to tiny screw misplacement or ribbon cable damage, costing users an extra S$100 to S$200 for professional rework, while certified repair shops maintain a 94% first-time success rate according to Singapore laptop repair benchmark findings.
That lines up with what technicians see all the time. People don't usually destroy the keyboard itself. They damage the connector latch, misroute a cable, mix up screw lengths, or force open a panel that wasn't meant to release that way.
DIY vs Professional Keyboard Replacement
| Factor | DIY Replacement | Professional Repair (e.g., myhalo) |
|---|---|---|
| Upfront cost | Can look cheaper if you only count the part | Higher at the start, but labour and handling are included |
| Hidden cost | Tools, shipping, wrong part orders, rework after mistakes | Usually clearer from the start |
| Risk level | Higher if you haven't handled ribbon cables or laptop teardown before | Lower if the technician handles that model regularly |
| Time investment | Research, ordering, teardown, troubleshooting | Mostly your travel or pickup time |
| Downtime | Can stretch if the part is wrong or the install fails | More predictable |
| Warranty | Usually limited to the part seller, if any | Often includes workmanship cover |
| Best for | Older low-value laptops, confident hobbyists, non-urgent situations | Daily-use machines, business laptops, students, urgent repairs |
What DIY gets right, and where it goes wrong
DIY still makes sense in some cases. If you've worked on laptops before, already own a precision kit, and your machine is older, a keyboard swap can be a reasonable weekend job. It also appeals to people who care about extending device life instead of replacing hardware too quickly.
But confidence can outrun reality. Some laptops let you lift the keyboard from the top. Others require a near-complete teardown from the underside. Many first-timers don't know which type they have until they're halfway in.
The most expensive repair is the one you do twice.
For teams that manage several devices, or for anyone comparing home fixes with structured repair workflows, this overview of in-house depot repair processes for business devices is useful context. It shows why standardised handling matters when a machine can't stay offline for long.
A practical rule for Singapore users
Use DIY when all three of these are true:
- You know the exact keyboard part number: Not just the laptop brand.
- You can live with downtime: If the machine is your only work or study device, that risk changes the equation.
- You're comfortable opening modern electronics: That includes latches, ribbon cables, and careful screw tracking.
Choose professional repair when any one of these applies:
- It's a current daily-use laptop
- The fault followed a spill
- You need a predictable outcome
- You don't want to pay for avoidable rework
If you're still comparing repair pathways in Singapore, this guide to common phone and device repair situations in Singapore is a useful companion because the same logic applies. A cheap first attempt isn't always the cheapest final outcome.
Gathering Your Tools and Sourcing the Right Part
Preparation decides whether a laptop keyboard replacement feels controlled or chaotic. Most failed repairs don't begin with the wrong screwdriver. They begin earlier, when someone orders the wrong keyboard, skips a backup, or assumes every laptop opens the same way.

The minimum toolkit that actually helps
A proper setup doesn't need to be elaborate, but it does need to match electronics work.
- Precision screwdriver set: Phillips bits matter on many consumer laptops, and Torx shows up often enough that it's worth having.
- Plastic spudger or opening pick: This helps you release clips without chewing up the casing.
- Tweezers: Useful for lifting tape, guiding small connectors, and handling screws in tight corners.
- Magnetic parts tray or labelled screw map: Mixed screws are one of the easiest ways to create trouble during reassembly.
- Clean, well-lit work surface: A dark dining table is where tiny black screws disappear.
Finding the correct keyboard
The laptop model on the lid isn't enough. You need the full model number, and in many cases the keyboard part number as well. Manufacturers often use several keyboard variants across one product family. Layout, backlight support, mounting points, and ribbon length can differ even when the laptop names look almost identical.
Check the bottom label, BIOS information, or original purchase listing. Then compare the replacement part photos carefully. Pay attention to the ribbon location, screw holes, and frame shape. A keyboard that is “compatible” in a marketplace title may still be wrong for your exact chassis.
A local sourcing challenge makes this harder. A 2025 Reddit AskSingapore survey found that 82% of Singapore consumers cannot find OEM replacement keyboards for recent 2024 to 2025 models at local physical stores, forcing reliance on 3 to 5 week overseas shipping, according to the AskSingapore discussion on physical keyboard part availability.
Safety checks before you open anything
Do these before the first screw comes out:
- Back up your files
- Shut the laptop down fully
- Disconnect AC power
- Remove or disconnect the battery when the design allows
- Ground yourself and work slowly
These steps sound basic, but they change the job. A rushed teardown with live power still present is how connectors get shorted and boards get marked.
A visual walkthrough helps when you're trying to understand the final testing stage before full closure. This video is useful because it shows the importance of checking key response before sealing the device back up.
What not to assume
Don't assume a single broken key means you can buy one loose key locally. Don't assume a keyboard listed under your brand will fit your revision. Don't assume your laptop opens from the top just because a tutorial for a different model does.
The careful part of the job begins before repair. If your part match is uncertain, stop there. That pause is cheaper than ordering twice or opening a laptop you can't reassemble cleanly.
The Step-by-Step Replacement Process
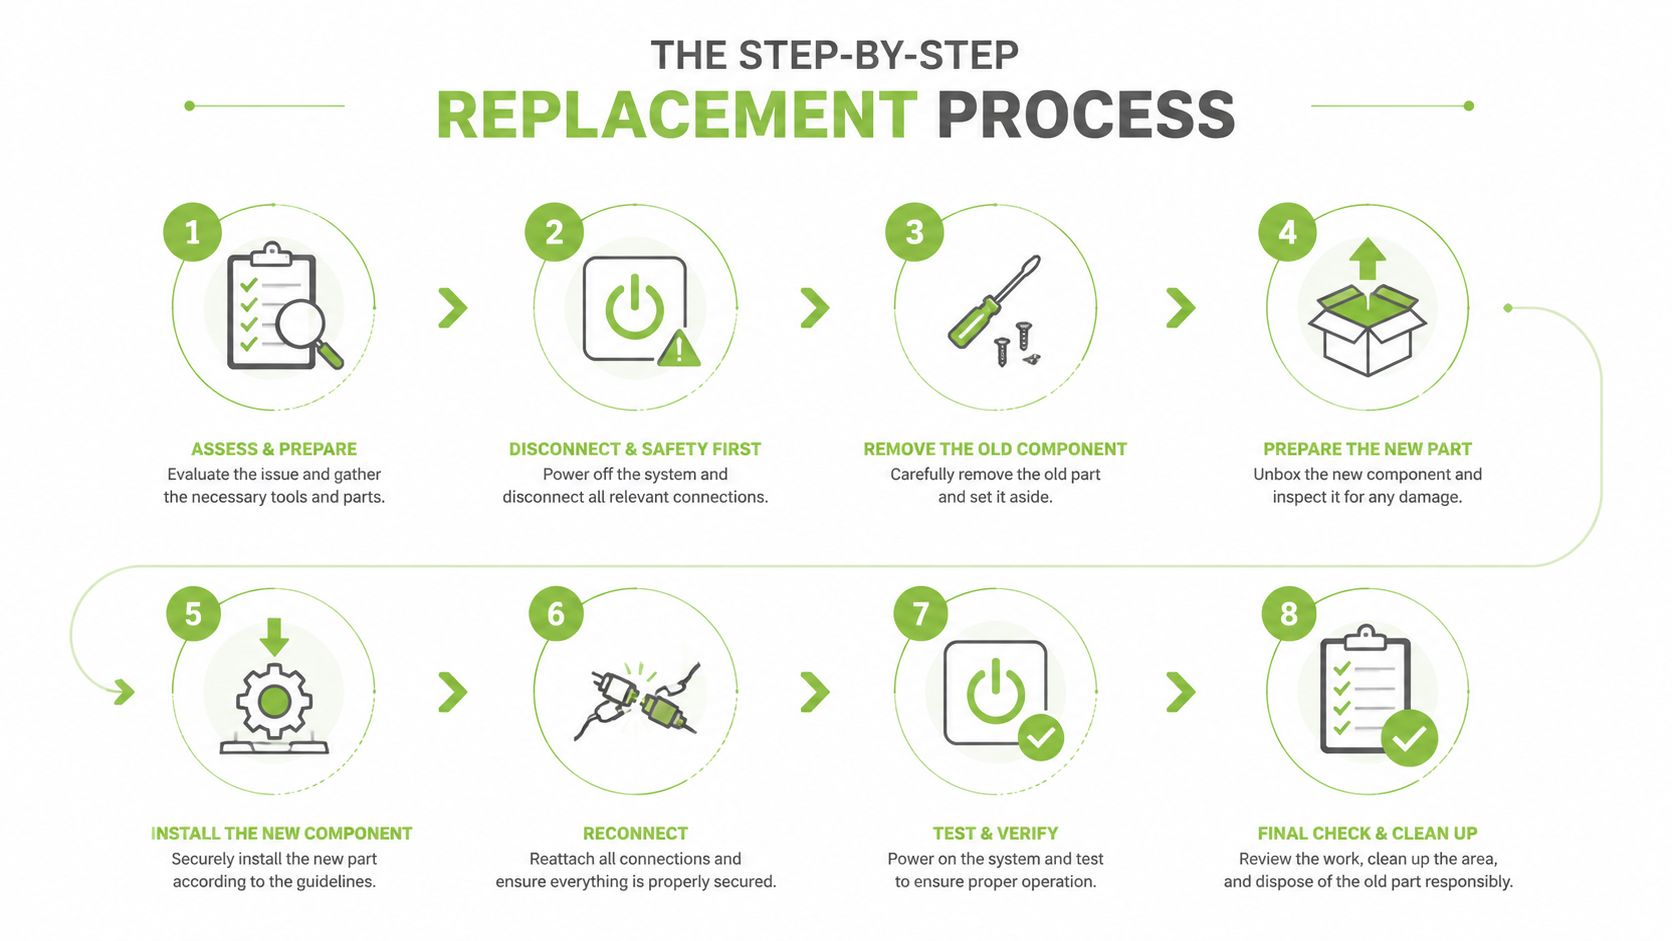
Laptop keyboard replacement splits into two very different jobs. Some laptops let you release the keyboard from the top side with clips or tabs. Others bury it beneath the chassis, battery, motherboard covers, and internal fasteners. You need to identify which design you have before force enters the picture.
First identify the keyboard style
Older and simpler designs may have visible tabs along the keyboard edge. On some laptops, two tabs on the plastic case hold the keyboard in place, one on the left and one on the right, and you must hold them aside while angling the keyboard upward before sliding it free. Other models use several top-edge tabs that need to be pushed inward with a spudger while you keep the released edge from snapping back down.
Integrated designs are more demanding. A documented Technibble forum case showed a keyboard that couldn't easily be lifted out because the unit was secured internally and required far deeper disassembly than generic “lift-and-replace” advice suggested. That's exactly why model-specific teardown logic matters.
The actual removal sequence
If your laptop uses bottom-up access, the standard protocol is more involved. You remove the bottom chassis, disconnect the battery, locate the keyboard ribbon cable on the motherboard, release that cable, and then install the new keyboard assembly. Don't rush the connector stage. That's where the job is won or lost.
A critical pitfall in laptop keyboard replacement is improper ribbon cable alignment, which causes 12% of failed replacements and leads to key auto-activation or non-response, according to local repair guidance on keyboard panel replacement protocol.
If the ribbon cable doesn't slide in straight, stop and reseat it. Forcing the latch won't fix alignment.
How to handle the ribbon cable properly
Most laptop keyboards connect through a small ZIF connector. The latch is usually a narrow flip-up or slide-lock piece. It is not meant to be pried out with force.
Use this approach:
- Open the latch gently: Lift or release only the moving retainer, not the socket body.
- Slide the old ribbon out evenly: If it snags, check whether the latch is fully open.
- Insert the new ribbon straight: No twist, no angle, no partial seating.
- Lock the latch only after alignment looks clean: The blue or reinforced end of the ribbon should sit evenly across the connector.
When keys fail in odd patterns after installation, the ribbon is often the first suspect. A misaligned cable can produce partial dead zones, repeated characters, or complete non-response even when the keyboard itself is new.
Clips, tabs, and hidden resistance
The casing gives feedback. Learn to read it. If a top panel lifts on one side but not the other, there is probably still a tab or screw holding it. On certain keyboards, several top tabs need to be depressed one by one with a spudger, and keeping the released edge slightly raised prevents the keyboard from snapping back into place.
If nothing moves, don't escalate with a metal screwdriver. Pause and recheck the screw map, the service manual if you have one, and the chassis edges for hidden fasteners.
Installing the replacement cleanly
Seat the new keyboard in the reverse order of removal. That sounds obvious, but there's a technique to it.
- Lay the keyboard in position without fastening everything immediately
- Check that the ribbon reaches naturally
- Connect the ribbon without pulling it tight
- Confirm the frame sits flat and tabs line up
- Secure the housing evenly
Avoid tightening one side completely while the other side is still floating. Plastic laptop frames don't like uneven pressure, and misalignment can leave the keyboard feeling bowed or make the top cover refuse to clip back down.
Some technicians use torque-controlled tools in repair environments to avoid board or casing damage. At home, the practical equivalent is simpler. Tighten screws until snug, then stop. Overtightening small laptop screws strips threads, cracks anchors, and creates the kind of problem that looks unrelated until the palm rest no longer sits flush.
Testing Troubleshooting and Final Reassembly
Don't close the laptop the moment the new keyboard is physically installed. Exercising disciplined repair here prevents a second teardown.
Reconnect what you need for a temporary startup, then boot the machine before replacing every screw and cover. If the model allows it, test with the chassis still open but stable on the table. That gives you one last chance to correct a cable or connector issue without undoing finished work.
The test that catches obvious failures fast
Open a text editor and type “the quick brown fox jumps over the lazy dog”. That sentence matters because it covers every alphabetical key. Then check the number row, arrow keys, function keys, and any special features your keyboard has, such as volume control or backlighting. This testing method is shown in the Dell keyboard replacement demonstration with full key verification.
If your laptop has a numeric keypad, test that separately. If it has brightness keys, media buttons, or keyboard lighting controls, test those before final closure as well.
A keyboard isn't finished when it's installed. It's finished when every key behaves normally.
Troubleshooting by symptom
Use the symptom to guide the fix.
- A whole block of keys doesn't work: The ribbon cable is the first thing to inspect. Power down and reseat it.
- Random keys type on their own: Check connector alignment again. That kind of behaviour often points to a poor connection.
- The keyboard works but feels uneven: The frame may not be seated correctly under its tabs or mounting points.
- The touchpad suddenly fails too: You may have disturbed another internal cable during disassembly.
This is also the point where screw discipline pays off. If the bottom cover refuses to sit flush, don't force it shut. A misplaced screw, trapped cable, or shifted clip is usually the cause.
Reassemble with care, not speed
Final reassembly is straightforward if you stayed organised.
- Return screws to their original holes: Laptop screws can vary in length even within the same panel.
- Check cable routing before closing: A pinched cable can create a fresh fault after a successful test.
- Press clips back into place evenly: Work around the edges rather than snapping down one corner first.
Once the machine is fully closed, do a final typing pass. If everything responds normally and the chassis sits flat, the repair is complete. If not, reopen it while the steps are still fresh in your mind.
Beyond Repair Sustainable Upgrade and Trade-In Options
Not every keyboard problem deserves a keyboard repair. Sometimes the numbers push you towards a broader decision. In Singapore, laptop keyboard replacement services can total S$260, with S$160 for parts and S$100 for service, representing about 25% of the price of a new laptop, according to Singapore keyboard repair pricing for parts and labour.
That changes the conversation when the laptop also has a tired battery, sluggish performance, hinge wear, or other pending faults. Repair still makes sense for many machines, especially when the device is otherwise healthy. But when multiple issues stack up, putting more money into one ageing laptop isn't always the sensible move.
When an upgrade is the better repair decision
A replacement becomes easier to justify when:
- The keyboard isn't the only failing part
- The machine no longer meets your work or study needs
- Parts are difficult to source
- You want to reduce waste without buying brand new
That last point matters. A sustainable upgrade doesn't have to mean factory-fresh hardware. Professionally refurbished laptops extend device life, reduce unnecessary disposal, and often give you a better-value machine than a rushed emergency purchase from a retail shelf.

Don't ignore the old device's remaining value
Even a laptop with a bad keyboard may still hold trade-in value depending on the model and overall condition. If you're deciding between one more repair and a cleaner upgrade path, it helps to look at laptop trade-in options in Singapore before spending on parts.
If the machine is at end of life, dispose of it properly. Responsible handling matters for batteries, boards, and data-bearing components. This guide to the disposal of electronic waste and safer recycling practices is a useful reference if repair and resale are both off the table.
The smartest outcome isn't always “repair at all costs”. Sometimes it's repairing. Sometimes it's replacing the keyboard. Sometimes it's stepping into a refurbished upgrade and keeping another device in circulation instead of creating more e-waste.
If your laptop keyboard has started failing and you want a practical next step, explore myhalo for sustainable tech options, from refurbished laptops and accessories to trade-in pathways that help you move on from a damaged device without wasting its remaining value.